Photo by Roman Synkevych 🇺🇦 on Unsplash
How to use Github Actions to automate email sending in Python
Introduction
Github Actions allows you to customize and execute all your software development workflows directly from Github. It makes it easy to include Continous Integrations and Continous Delivery (CI/CD) by automating your build, test, and deployment pipeline right from your repository. In this article, I will be introducing you to Github Actions, its components, and how to automate email sending using Github Actions in Python.
What are Github Actions?
Github Actions is a Platform built by Github that gives developers the ability to create workflows to compile, build, test, and deploy code from their Github repository. It allows continuous integration into development by building pipelines to detect errors across all issues, commits, and pull requests and continuous deployment by deploying merged pull requests into production.
Components of Github Actions
Workflows
A workflow is an automated operation that contains one or more jobs that are triggered when an event occurs in the repository. They are usually defined by YAML files in the repository and can be used to test, build and deploy code.
Events
An event is a specific activity that triggers a workflow run in the repository. It includes pushes or commits, raising an issue, Pull requests, etc.
Jobs
A job is a collection of steps in a workflow that runs in parallel by default on the same runner.
Actions
Actions are individual tasks that can be combined to create jobs and customize workflows.
Runners
A runner is a server or machine already installed with Github Actions that runs workflows when they are triggered and reports results and progress.
Automate Email sending in Python using Github Actions
After learning about Github Actions and its components, let's dive into its usage by automating email sending in Python.
Step one
Create a new Github repository and clone it on your system, I will be naming mine github-actions-email-sending
Step two
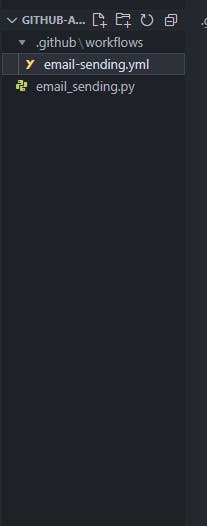
Create a folder named .github in your cloned repo and a subfolder named workflows. In the workflows folder, create a new yml file, I will be naming mine email-sending.yml. Lastly, in the root folder create a new python file called email-sending.py.
Note: Your yml file and python file don't necessarily have to be the same name. You can name them differently.
your files structure should look like this:

Step three
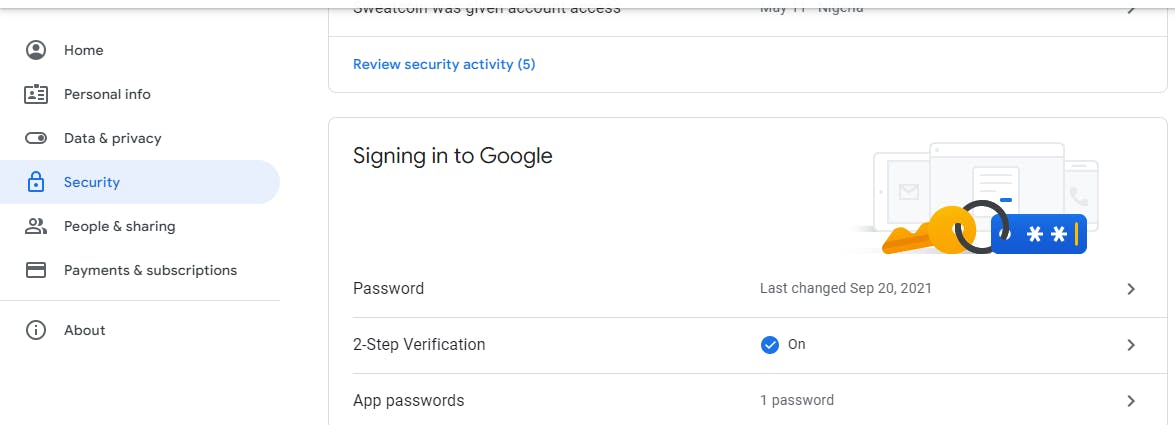
Create a Gmail Account and get your app password. An app password can be generated from a user's Gmail account by setting up Two-factor Authentication and generating the password in the Security section of the account.

Step four
We will be importing the smtplib and ssl libraries to send a simple message. Add the following codes to your email-sending.py file.
import smtplib, ssl
import os

port = 465
smtp_server = "smtp.gmail.com"
USER_EMAIL = os.environ.get("USER_EMAIL")
USER_PASSWORD = os.environ.get("USER_PASSWORD")

message = """\
    Subject: Welcome Ubaydah

    This is your welcome email running
"""

context = ssl.create_default_context()

server = smtplib.SMTP_SSL(smtp_server, port, context=context)

server.login(USER_EMAIL, USER_PASSWORD)
server.sendmail(USER_EMAIL, USER_EMAIL, message)
The code above sends a simple message as mail to a user, my email and password will be added as environment variables. I repeated my USER_EMAIL in the Sendmail() argument since I am sending the email to myself, the second argument can be changed to represent another email address.
Step five
Create your workflows in the yml file.
Add the following codes
name: email_sending

on:
  schedule:
    - cron: "*/5 * * * *"

  workflow_dispatch:

jobs:
  build:
    runs-on: ubuntu-latest
    steps:
      - uses: actions/checkout@v2
      - uses: actions/setup-python@v2
        with:
          python-version: 3.x
      - name: Send email
        env:
          USER_EMAIL: ${{ secrets.USER_EMAIL }}
          USER_PASSWORD: ${{ secrets.USER_PASSWORD }}
        run: python email_sending.py
name specifies the name of the workflow we want to carry out.
on defines the type of events being carried out. Since my event will occur continuously, I am using the schedule event which triggers the workflow at the scheduled time defined by the crontab. I defined my time to run every 5th minute i.e every minute divisible by 5. The stars represent minutes, hours, days of the month, month, and days of the week respectively. The workflow_dispatch allows us to run it manually mostly for tests without waiting for our scheduled time.
jobs includes the steps I am performing in the workflow, it consists of my build which I am running on an ubuntu server already installed on Github Actions.
uses refers to the actions we are running our workflow on, the first use is an official GitHub Action used to check out a repository so a workflow can access it while the second helps set up python with the version indicated.
name indicates the name of the step we want to carry out.
env indicates the environment variables that are stored in Github Secrets while the run command runs our python script if the entire workflow succeeds.
Note: You can read more on Cron Syntax here
Step six
Go to your Github repository settings and add the environment variables in Github Secrets

Step seven
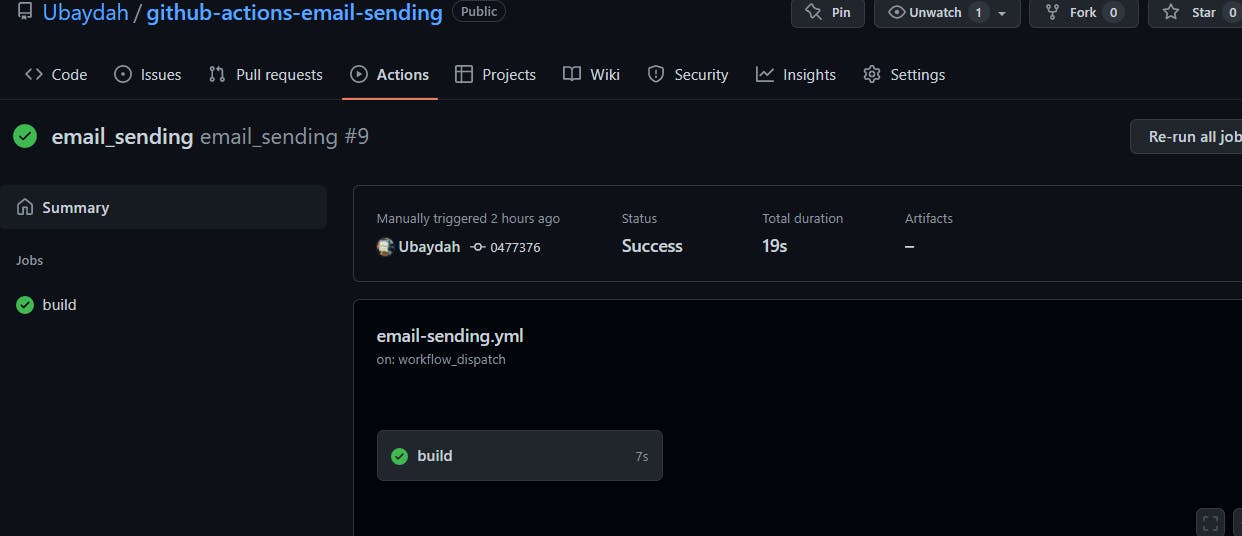
Commit your codes and push them to Github and go to the action tab to run your workflow manually to test before letting the scheduled event gets triggered.

Step eight
Check the status of your build whether it succeeds or fails

Finally, leave the workflow to run at your scheduled time and watch the emails land in your inbox.

Resources
Conclusion
We have learned about GitHub actions and how to use them in a real-life process by automating email sending in python. All codes can be found in this repository.
Connect with me on Github
Thanks for reading.
